The following was posted by fenderfour on rockclimbing.com. I have copied it here with no changes other than basic reformatting.
How to make Russian Aiders

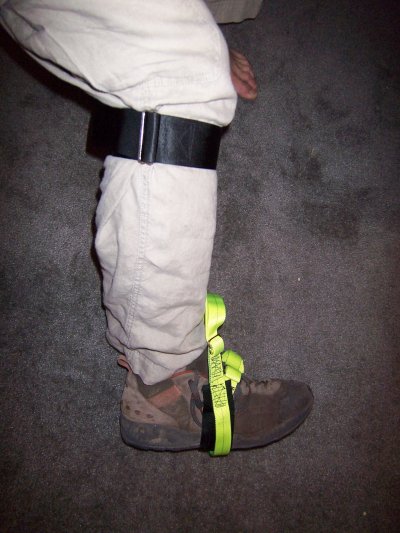
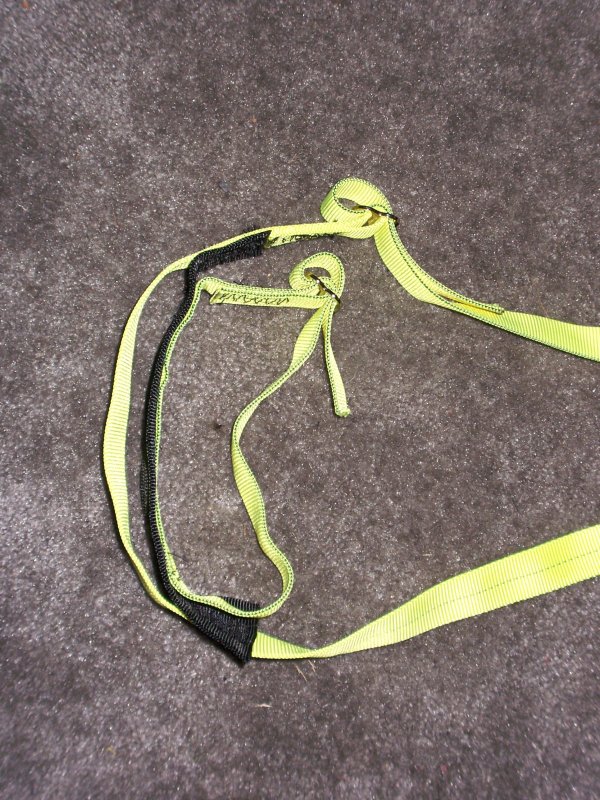
Leg hook side
One wide strap goes around the calf just below the knee. The hook is positioned
on the inside of the knee to facilitate hooking the rigs of the aid-tree.
The wide black webbing around the knee is 2" wide seatbelt webbing, about 24" long. The buckle at the end is a nickel plated steel double-back buckle.
The narrow yellow webbing is 1" wide tubular. The buckles are nickel plated steel as well. The main piece of webbing running from the hook around the bottom of the foot is about 50" long.
The black webbing on the footbed is 2" wide tubular webbing. It's about 9" long.
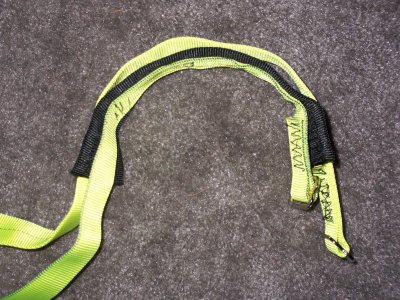
Leg outside
The short strap across the top of the foot is 1" wide tubular. It is about
18" long and has the same nickel plated buckle as the main webbing.
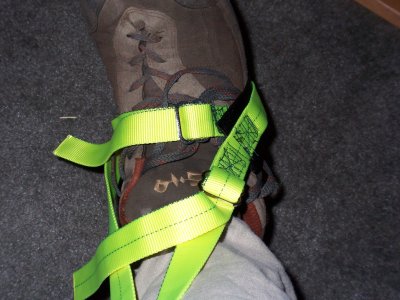
Foot
Here's a close-up of the footbed. The buckles are on the outside of the leg to
reduce wear.
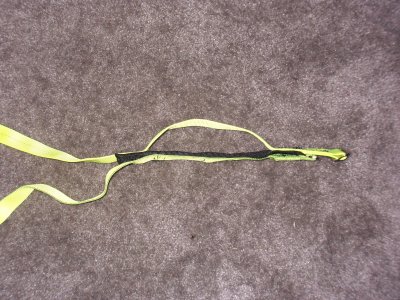
Assembled aider
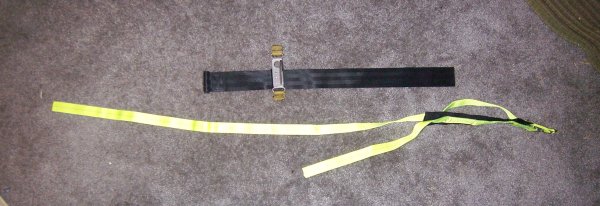
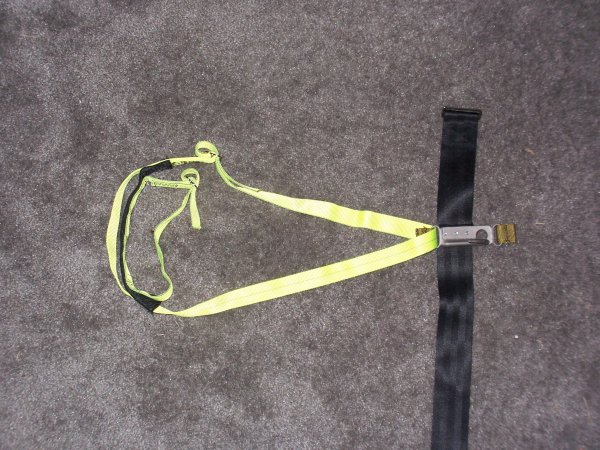
Disassembled aider
The aider is actually two pieces. The long yellow strap goes through the bottom
loop of the hook with a half twist and buckles back on itself.
Buckled footbed close-up
The inner (smaller) strap goes around your foot so that it doesn't slip out of
the aider. It is sewn continuously along the footbed. I tried using the aiders
without this strap and it was a real pain.
Unbuckled footbed close-up
The original aiders had a strap that went around your ankle to perform this
function. It tended to get in the way, so I copied the straps used on the
Metolius Easy Aiders instead. I've used them heavily and they worked well.
Footbed close-up showing pooch
I added some extra material when I sewed in the footbed. This was mentioned in
the Kung-Fu aider How-to and it seemed like a good idea. The reason you leave
the extra material is so that your weight is carried by the wider 2"
webbing instead of the main 1" strap. I wanted one continuous strap from
the hook all the way around the foot so that I wasn't entirely screwed if the
stitching for the footbed failed.

Front side of hook
The hook plate is a piece of Ti bar stock 1" wide x 2 1/2" long x
1/8" thick. The hook has been welded to the base plate. The loops are made
from thin wall Ti tubing that has been smashed a bit to elongate the radius.
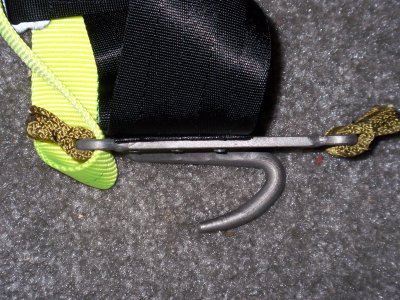
Side of hook
The hook itself is 1/4" diameter Ti bar stock. The hook is about
1 3/8" from the front side of the plate to the tip of the hook as shown in
this photo.
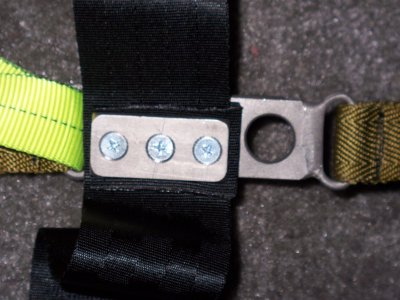
Back of hook
You can clearly see that the hook is held on with 3 countersunk screws. The
base plate of the hook has three tapped holes to accept the screws. I used a
soldering iron to make neat holes in the knee strap. I also used a small piece
of webbing as a “pad” for the metal to webbing interface. I think
that the metal will wear on these small pieces of webbing instead of the main
strap.
Plate Dims: 1" wide x 2" long x 1/8" thick
Notes on Construction:
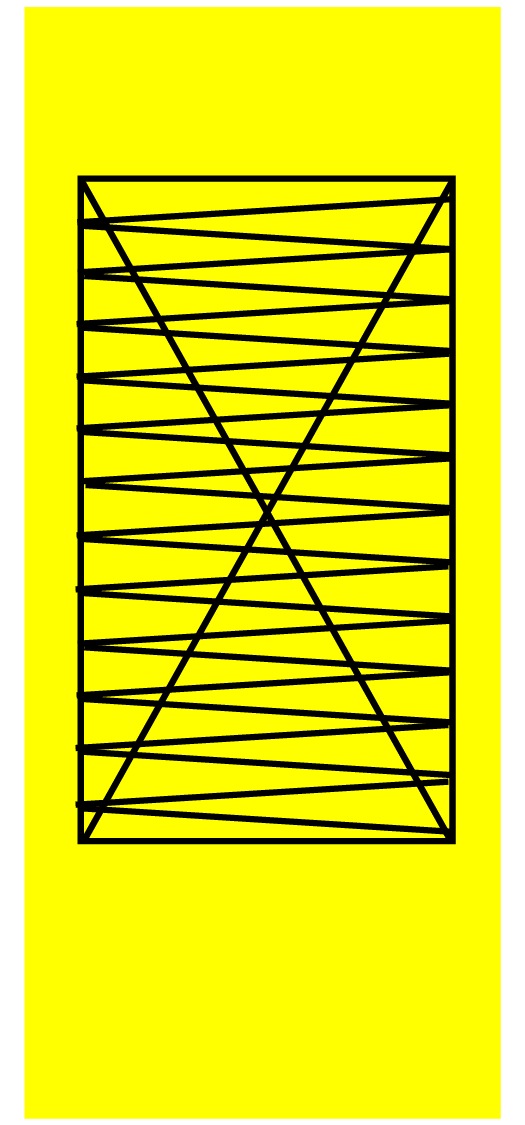
Stitching pattern
I bought all the webbing and hardware (except hooks) from Seattle Outdoor
Fabrics:
http://www.seattlefabrics.com/.
The hooks could be easily manufactured by anyone with a welder.
I left about 2" of material to sew buckles on. I used a 10# test nylon upholstery thread. I did not have a bartacker, so I used a straight stitch. For every buckle, I used a stitch pattern like this:
When I started this project I wasn't very good at sewing. I'm still not. It's like climbing - you will get better after thrutching around for a while.
I used a basic Kenmore belt-driven machine. I went slowly and never sewed more than 2 plys of webbing at a time.
I think the needle you use is pretty important. Most people grab the biggest needle they can find and have at. I think the trick is to get a thinner needle so it will slide through the webbing easier. I bought some of the thinnest needles for sewing jeans. I dont' remember what size they were. The eye had enough space for the thread and it still slid through the webbing easily. Even though the needles were thin, they were sufficient. I think I broke two needles as I sewed up two sets of cuffs.
When you get to sewing you will need to experiment with thread tension. Get some short pieces of webbing and start sewing. Adjust the tension until you can sew without snags or breaking the thread.